Ground source heat pump installation step by step
See what an installation looks like from start to finish
Without previous experience of a heat pump installation it can be difficult to visualise the steps involved. This example installation shows you the steps involved for a system involving a ground loop collector and during a full renovation of a home, similar to a new build situation.
Clients undertaking the complete renovation of their home in Caernarfon approached installer Bryan Jones of Total NRG to make their project as energy efficient as possible.
Step 1: the specification and planning. Working with the Stiebel Eltron technical team Bryan produced a detailed heating scheme for the clients that took into account every aspect of the build, the environment and the clients’ aspirations for the project. This included under floor heating to be installed all through the house at 100mm pipe centres to reduce the flow temperature, and increase efficiency. As the property benefitted from ample grounds, a ground source heat pump with a ground collector loop was selected as the most efficient possible heat source. As all 3 floors of the house were timber, Bryan recommended a biscuit mix to create thermal mass and make the system more efficient, (structural stress calculations were essential here to ensure the extra weight could be carried by the building). Rocky ground meant that extra tough RC pipe was specified for the ground loops.
Bryan Jones said, "We chose a a WPF 20 SET (S) from Stiebel Eltron for our clients. The property had single phase power and a high heat loss; common problems for UK properties when it comes to using a heat pump, which often require 3 phase supply and are thought of as best for air tight and highly insulated new build properties. But this solution can cope with both of those challenges and still deliver green and efficient heating and hot water".
Step 2: The build – the build and install phase took 2 weeks
Once the scheme and costs were agreed with the client, installation began with the goundworks. The first step was to dig the trenches for the ground loop. For a new build or fully renovated home you need approximately double the area of the total floor space of the property for the ground collector (where this space is not available horizontally, vertical boreholes can be used instead).
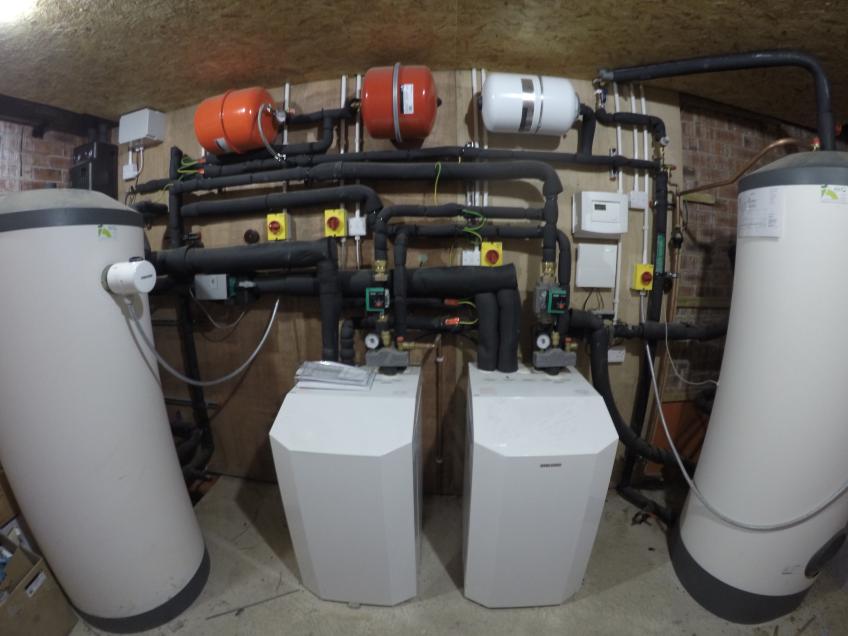
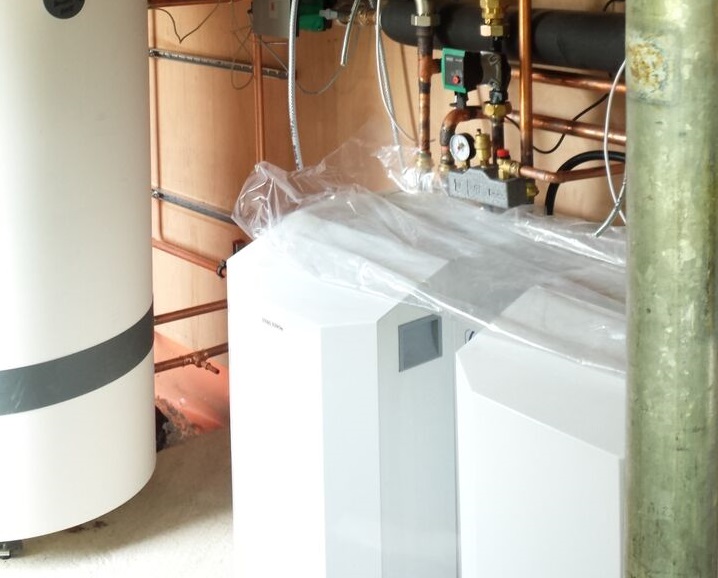
Meanwhile, indoors the plant room is installed and the pipe laid for underfloor heating. Scroll through the pictures in the gallery below to see these stages.


Step 3:
Once all the internal and external pipes were laid the system was connected and tested. Once it was clear that the system was working and that all the joins were tight, the pipes inside and out could be covered over.
Step 4: Completion of the project and ongoing management
At this point the final finish inside the house was applied. As the final fix was completed on the house, the control systems for the heat pumps were added and tested, and the system configured and handed over to the client. Whilst this is traditional end of heating projects, ongoing monitoring of the system via our Internet Gateway system is an option. This allows you, or your maintenance team, to watch and fine-tune the performance of the system and catch any problems even before they might be evident in the property.